Are you using Windows 11 and wondering why your programs, fonts or images are blurry? You can easily find the possible causes with a few simple tips and tricks. In this guide, we'll explain why the display can be blurry when using r Windows 11 and what settings you can use to make apps and texts sharp again.
Monitor knowledge
Windows 11 blurry
Tips for sharp display of text and apps

Windows 11: Image is blurred
A blurry or out-of-focus monitor in Windows 11 can be the result of various causes. One of the most common causes is an incorrect resolution which often leads to a blurred image, especially when using multiple monitors. An incorrect DPI setting can also cause the monitor to become blurry on Windows 11. The good news is most of the possible causes can be fixed in just a few steps so you can ensure texts, images and apps are displayed sharply again when using Windows 11.
If the output resolution and native resolution differ, the image must be converted. For example, a monitor with a native resolution of 2560 x 1440 (WQHD) displayed with a resolution of 1920 x 1080 (Full HD) will be blurry unless the content is converted accordingly. This process is always at the expense of the monitor quality and should therefore be avoided if possible.
To avoid a blurred monitor when using Windows 11, the following therefore applies: Always set the native resolution of the monitor in the operating system. You can find information on the native resolution in the information material or the operating instructions for your monitor. You can access the corresponding settings under Windows 11 as follows: Right-click on a free space on the desktop > "Display Settings" > "Scale & Layout" > "Display Resolution". The option with "... (recommended)" at the end should always be the native screen resolution.
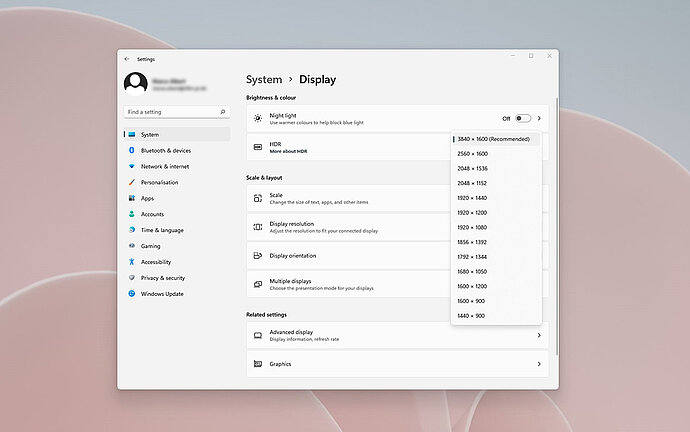
Set the native resolution of the screen.
When choosing the right monitor, we recommend you go for the highest possible resolution, which results in a finer pixel matrix and improved readability:
27-inch screen: We recommend a resolution of at least 2560 × 1440 pixels, better 3840 x 2160 (also known as UHD). You get significantly more desktop workspace with this combination of screen diagonal and resolution, which is especially advantageous for multitasking.
32-inch screen: We recommend a resolution of 3840 × 2160 pixels to make the most of the screen area in combination with a 16:9 aspect ratio.
38-inch screen: We recommend an UltraWide resolution of 3840 x 1600 for the optimal combination of workspace and display quality.
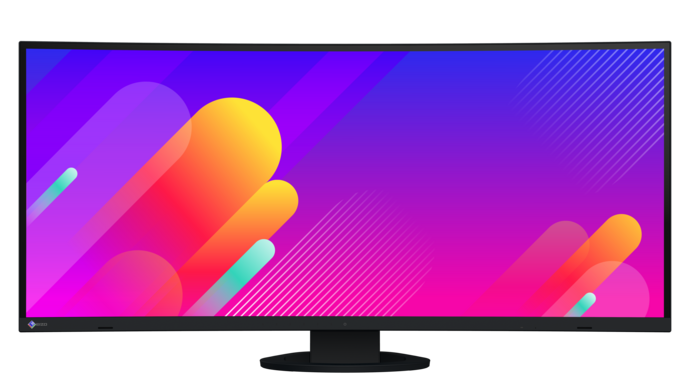
For a 38-inch screen, like the FlexScan EV3895, we recommend an UltraWide resolution of 3840 x 1600 for the optimal combination of workspace and display quality.
The right resolution
The DPI value is crucial for a clear and legible display under Windows 11. DPI stands for "dots per inch" and is often also referred to as PPI (pixels per inch). This value describes the so-called pixel density and accordingly indicates how many pixels per inch (2.54 centimetres) are available. An unfavourably set DPI value can also lead to a blurred monitor when using Windows 11.
The DPI scaling setting can be found as follows: Right-click on an empty space on the desktop > "Display Settings" > "Scale & Layout" > "Scaling". In most cases, the scaling is pre-set to 100 percent. However, this value is not necessarily ideal for your application. For optimal readability, you can therefore experiment with other scaling’s to improve the display in this way. For example, 150 percent is recommended for 32-inches with Ultra HD or for 27-inch displays with WQHD resolution.
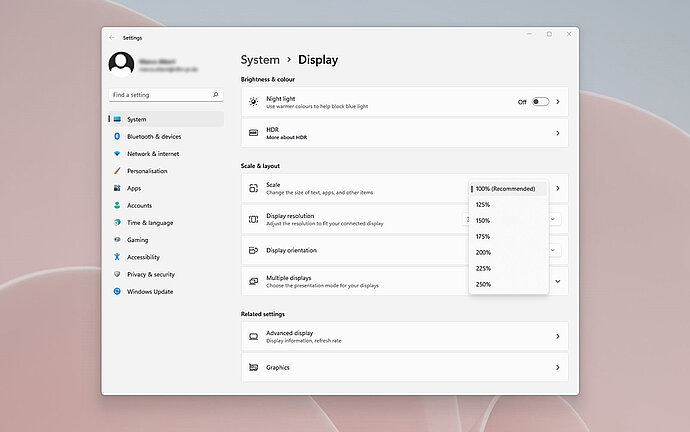
In most cases, the DPI scaling is pre-set to 100 percent. However, this value is not necessarily ideal for your application.
Windows 11 also allows you to adjust the DPI differently depending on the app. If you want to adjust the value for a specific app, right-click the app's icon and then click the following menu items: "Properties" > "Compatibility" > "Change high DPI settings" > "Use this setting ...". This way you can adjust the scaling to your liking for one app only. Especially older applications which may have problems with scaling above 100 percent. Frames are not dynamically adjusted and texts overflow. This can be prevented by a suitable scaling or setting to 100% for such applications.
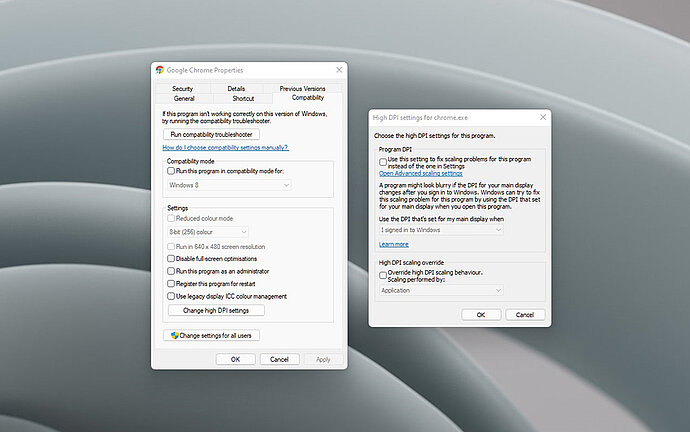
Windows 11 allows different DPI settings depending on the application.
DPI scaling
Blurred text when using Windows 11? If the typeface is not sharp, the operating system offers you another option for optimisation which is already known from previous Windows versions: Cleartype. This is a technique which leads to improved readability. Windows 11 shows you different typefaces in several steps and optimises the monitor based on your readability rating. You can easily start this optimisation with the following steps: Open the system settings and enter "Cleartype" in the search field. The wizard will then start. Now follow the on-screen instructions.
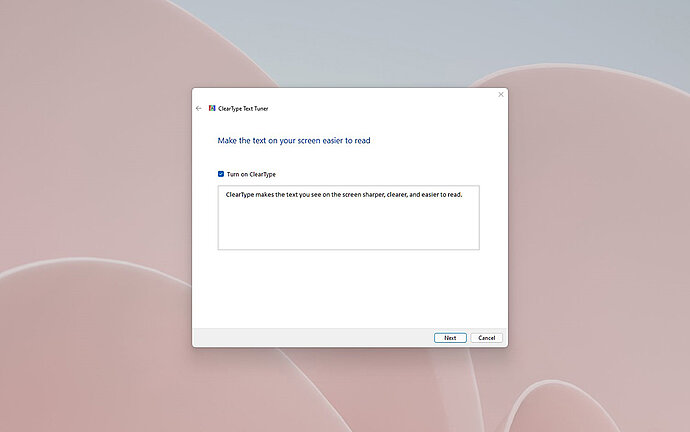
Better typeface with Cleartype - a technique that leads to improved readability.
Better typeface with Cleartype
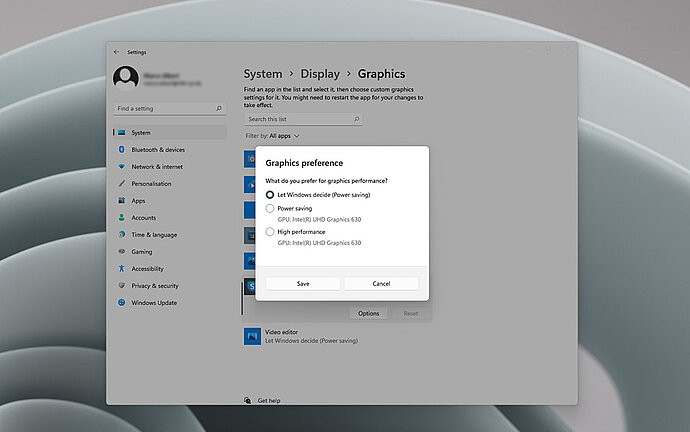
Settings for the energy saving mode can have an influence on the display under Windows 11.
Check power save mode settings
If the display is blurry when using Windows 11, it may be worth taking a look at another area of the operating system's settings. This is because Windows 11 allows you to run programs at full performance or in energy-saving mode. Especially if you only observe the problems in connection with individual apps, you should make sure that "High performance" is selected. You can get to the corresponding setting by right-clicking on the desktop and then selecting "Display Settings" > "Related Settings" > "Graphics". Here they now select the desired app and then "Options".
Using several different monitors can also lead to an unsuitable display. If both monitors work with different native resolutions this should also be reflected in the settings. You can access the corresponding options menu by right-clicking on the desktop and selecting "Display Settings" > "Scale & Layout" > "Multiple Screens".
In the settings window which now opens, you can specify both scaling and resolution for all connected monitors. Make sure each monitor is controlled with the respective native resolution.
This window also lets you specify how Windows 11 handles the display on the monitors. If the displays are expanded, each screen shows an independent desktop workspace, however, if two monitors are duplicated, both displays will receive the same signal. This will only result in a sharp image if both monitors have the same resolution. If this is not the case, we recommend the extended display.
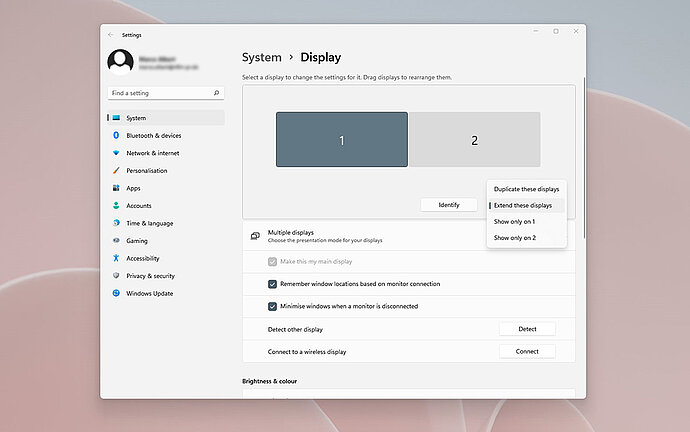
When using multiple monitors, you can specify how Windows 11 handles the display on the monitors.
Windows 11 with multiple screens
In addition to a sharp display, you can also use other tricks to provide more clarity when operating Windows 11. This includes a tidy window layout when using multiple programs which is much more comfortable with Windows 11 than with earlier Windows versions. To arrange windows automatically, simply move the mouse pointer over the "Maximise" icon in the upper-right corner of a window. The selection of available layouts then opens. Click to select your desired arrangement and then distribute the programs to the available segments.
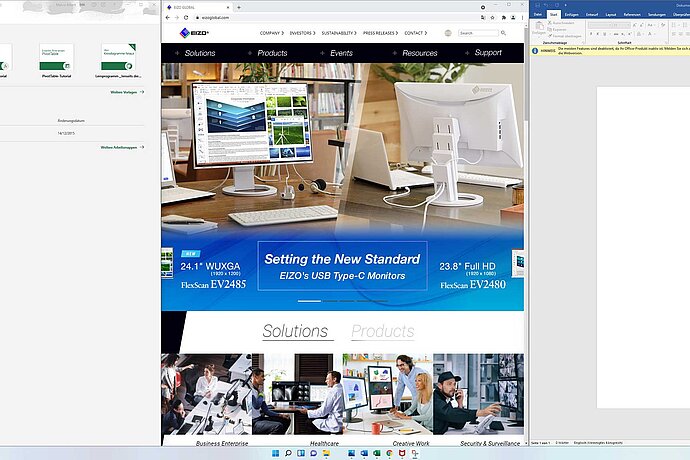
When using multiple programs, a tidy window layout provides a better overview.
Windows 11: Efficient window management
Many functions of Windows 11 can be accessed more quickly and easily via special key combinations - so-called shortcuts. We have compiled the most important ones for you here:
- Windows key + A: Open quick settings
- Windows key + I: Open settings
- Windows key + Z: Open window management
- Windows key + arrow keys: minimise (bottom), maximise (top) or move the active window to the left/right side of the screen (left/right)Windows key + M: minimise all active windows
- Windows key + Plus key: Activate screen magnifier
- Alt key + Tab key: Switch between active applications
- Windows key + Shift key +S: Create and crop a screenshot
- Windows key +W: Open widgets
- Windows key +N: Open notification settings
Windows 11: helpful shortcuts
Windows 11 offers you the option to activate a so-called night mode by default. In this mode, the display is adjusted to a customised colour scheme. For example, it provides warmer colour and white tones at the end of the day. However, this changes the colour reproduction which interferes with image editing, for example. Check here whether the night mode is switched off: You can find the corresponding setting options by right-clicking on the desktop and then selecting "Display settings" > "Night mode".
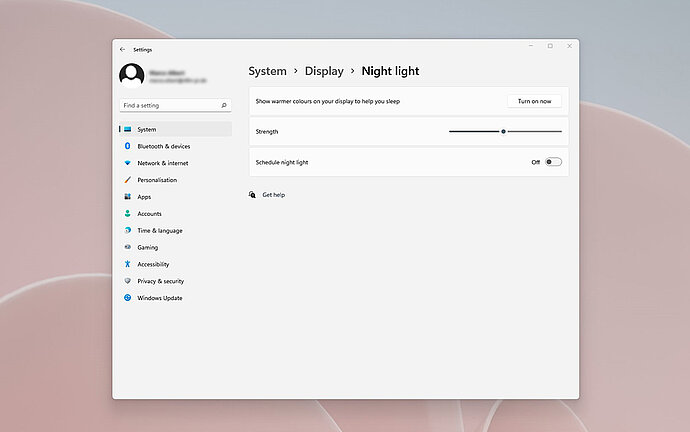
In night mode, the display is adjusted to a custom colour scheme.
